
Guide chapter
RISC-V Tutorial Part 2 — Creating the Development Environment
Part 2 of 3 in the RISC-V & CH32V Tutorial.
Introduction
The title may seem scary, as anyone who has ever “created an environment” knows what that entails. But fear not, because we are not going to be dealing with consoles, environmental configurations, or any of that nonsense. No, the designers of the MounRiver IDE and the WCH Link E programmer actually had braincells (not just one shared between the engineering team), with the result being a simple one click installer, a plug and play programmer, and an in-built firmware flasher to make sure that your WCH Link E is correctly configured for RISC-V devices. Ready to use the most simple and elegant software development environment?
How the Environment Works
When you’re diving into a new microcontroller, the first thing you need is an environment—a software setup that lets you develop and test your ideas quickly. Traditionally, these environments are clunky, full of hidden steps, and borderline unusable no thanks to the use of consoles, command lines, linkers, building settings, and sadly, a lot more. But with the CH32V and the MounRiver IDE, it’s a completely different ballgame. If typical microcontroller setups are 1 ply toilet paper, the MounRiver experience is the luxury 3-ply scented toilet paper, it's smooth, it’s quilted, and - dare I say it - makes you look forward to using it again. Plus, you can never go back to 1 ply ever again. Everything you need to get up and running with the CH32V microcontrollers is neatly packed into one simple IDE: MounRiver. Now, I know what you're thinking—Eclipse-based environments can be a bit of a nightmare. But trust me when I say that MounRiver makes it work. It somehow sidesteps the usual Eclipse frustrations and delivers a clean, polished experience. It’s available for Windows, Mac, and Linux, and after testing it across all platforms, we can confirm: it works right out of the box. No hassle, no surprises. Just plug and play. Now, you’ll need the WCH Link E programmer to get code onto your RISC-V device, and this little piece of tech has its own trick up its sleeve. It’s got two modes: one for ARM and one for RISC-V. Make sure it’s set to RISC-V mode (more on this later), and you’re good to go. Once everything is installed and connected, you can dive straight into your first project. No wasted time, no need to consult half-baked documentation. In the end, this environment is exactly what we’ve been waiting for: intuitive, fast, and efficient. For engineers who want to get straight to building without the typical tech industry roadblocks, it doesn’t get much better than this.
What You Need
To get started with the RISC-V world, this tutorial series, and any serious amount of development, you will only need two things:
- The CH32V RISC DIP from MitchElectronics
- The WCH Link E Programmer (available from MitchElectronics and a lot of other places)
- Three DuPont Connectors (either male-female or female-female)
Unlike other development kits which will have you fleshing out a lot of money, the CHV32 RISC DIP parts from MitchElectronics contain nothing but the IC itself, making it really cost effective. Furthermore, because of how the CH32V RISC DIP is packaged, it acts more like a component than a development board, meaning that you can easily create new breadboard, stripboard, and custom PCB designs, and simply insert the DIP package into a DIP socket. The price of the WCH Link E is also absurdly low. If you acquire a unit from online e-commerce stores from China (such as AliExpress), you can probably get one for a few dollars at the most. Of course, dealing with suppliers is never easy, so if you want your programmer to arrive quickly (and pass all needed quality checks), then you can get one of the WCH Link E programmers that MitchElectronics stocks. If you want to get everything you need in a single package, then you can also get the MitchElectronics RISC-V starter kit.
Step 1 – Getting MounRiver
MounRiver is the IDE that allows us to program the WCH range of microcontrollers, and is very easy to install and use.
To download the IDE, visit the MounRiver website (link below), click the Download button in the navigation window, click your operating system, and then click the MounRiver Studio Setup V210.
Main Page: www.mounriver.com
Direct link (Windows): file-oss.mounriver.com/upgrade/MounRiver_Studio_Setup_V210.zip
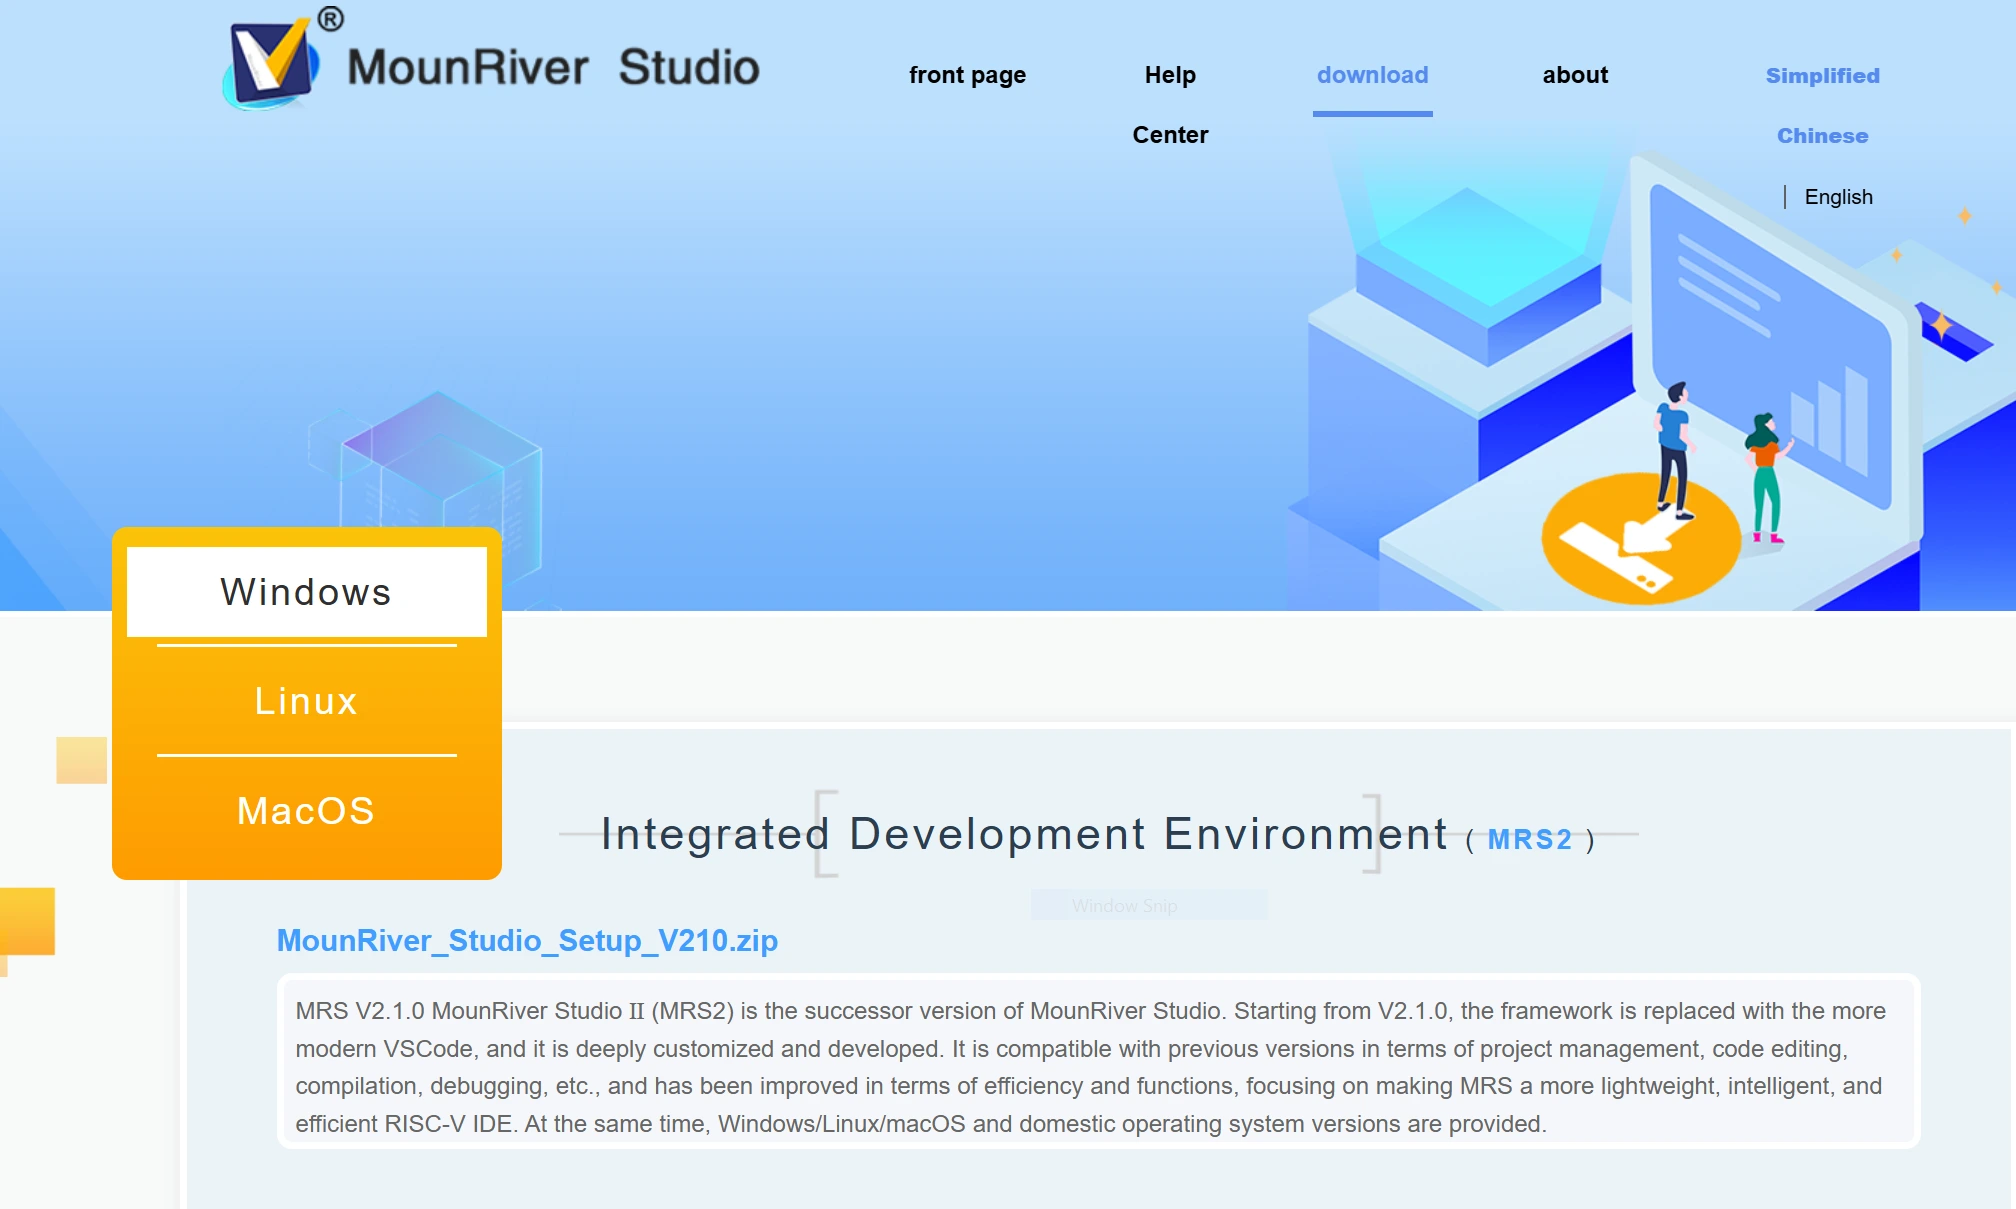
For whatever reason, the website is incredibly slow and difficult to navigate. To make sure that the software is always available, we will periodically check the download link ourselves and host the latest download version on our secure servers. The file should be around 328MB for Windows, 370MB for Linux, and 722MB for MacOS.
Step 2 – Installing MounRiver
With the software downloaded, it’s time to install MounRiver. The installer only needs you to select that you have read and agreed to the license, and once that’s done, it will install everything you need with no additional queries needed. Honestly, it is one of the simplest installers you will ever use.
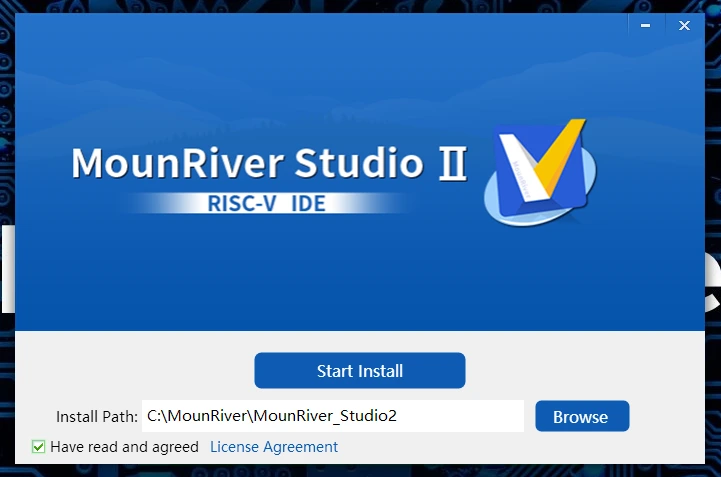
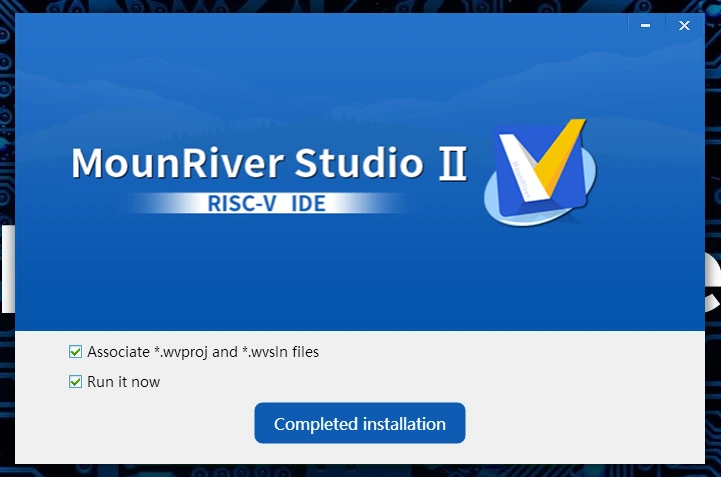
Once installed, you will be presented with the option to run MounRiver Studio and associate projects with the application. Enable both options and complete the installation.
Step 3 – Launching MounRiver
The IDE should auto launch after installation (as you selected that option).
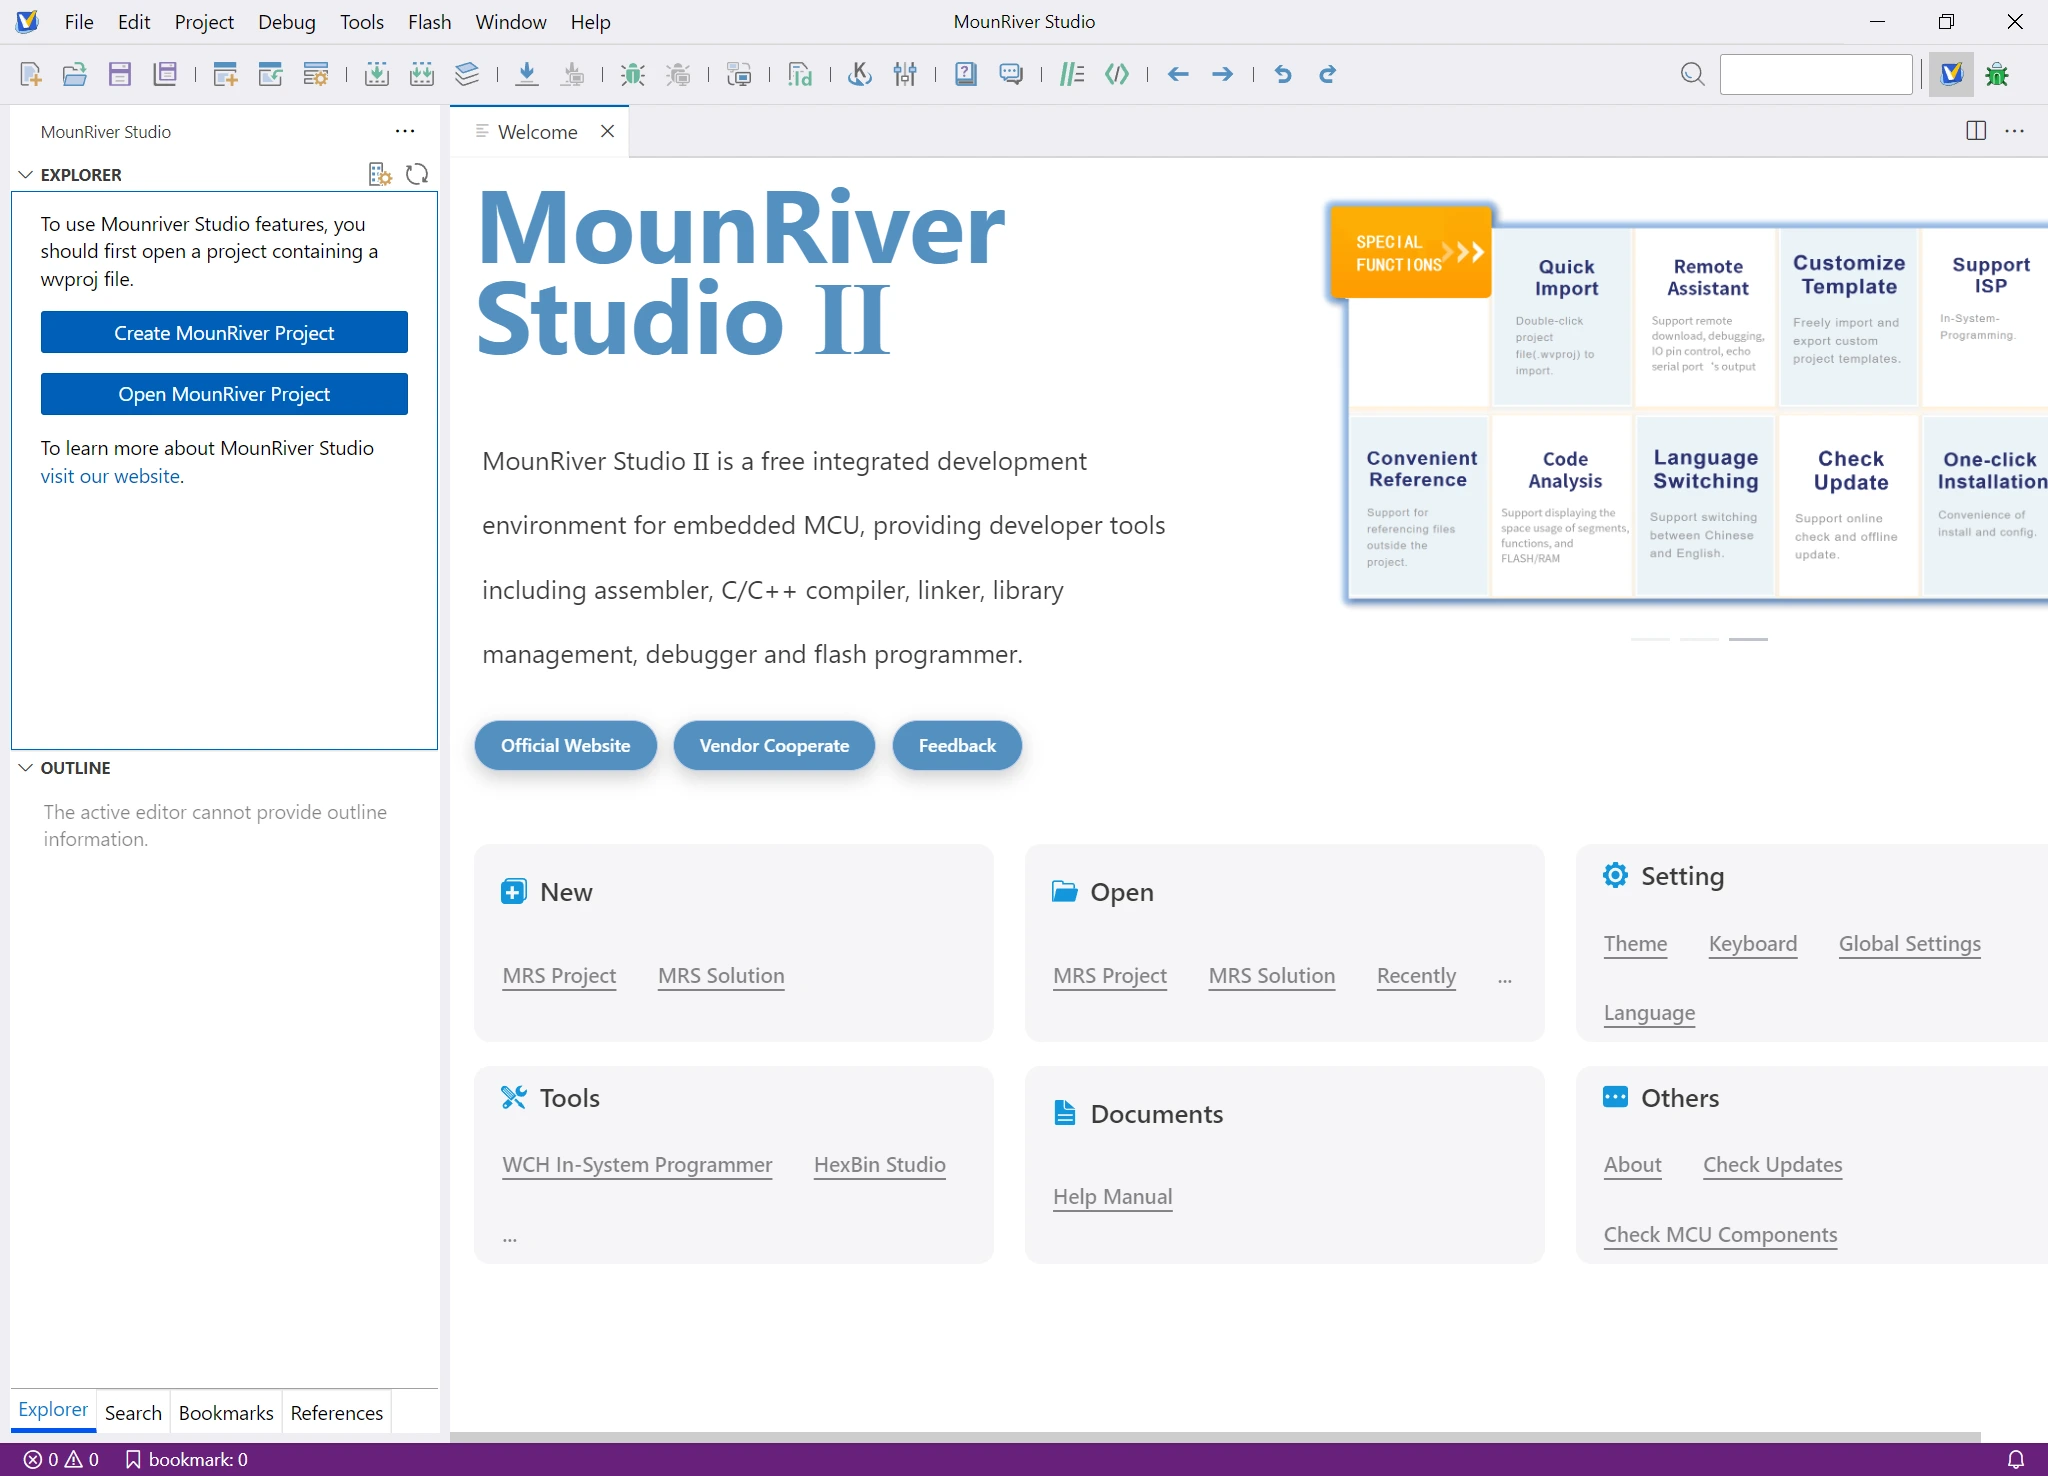
When the IDE first runs, it will likely inform you that there are updates which could / should be applied. Make sure they are enabled and apply all the updates.
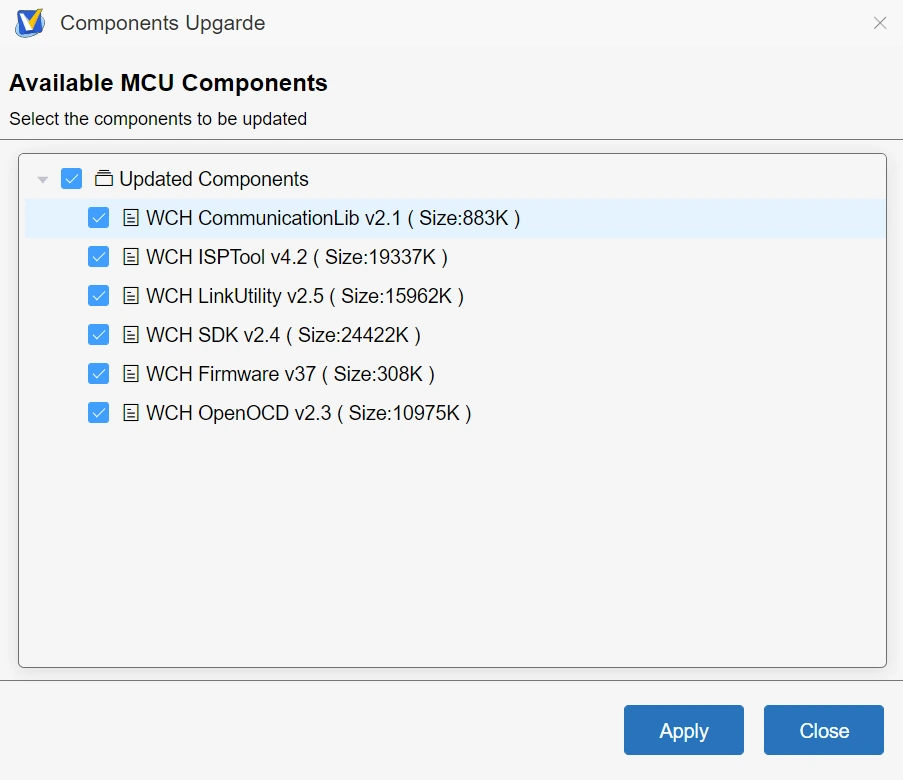
The IDE will automatically close down and relaunch. From there, MounRiver is ready to go!
Step 4 – Creating a Blank Project
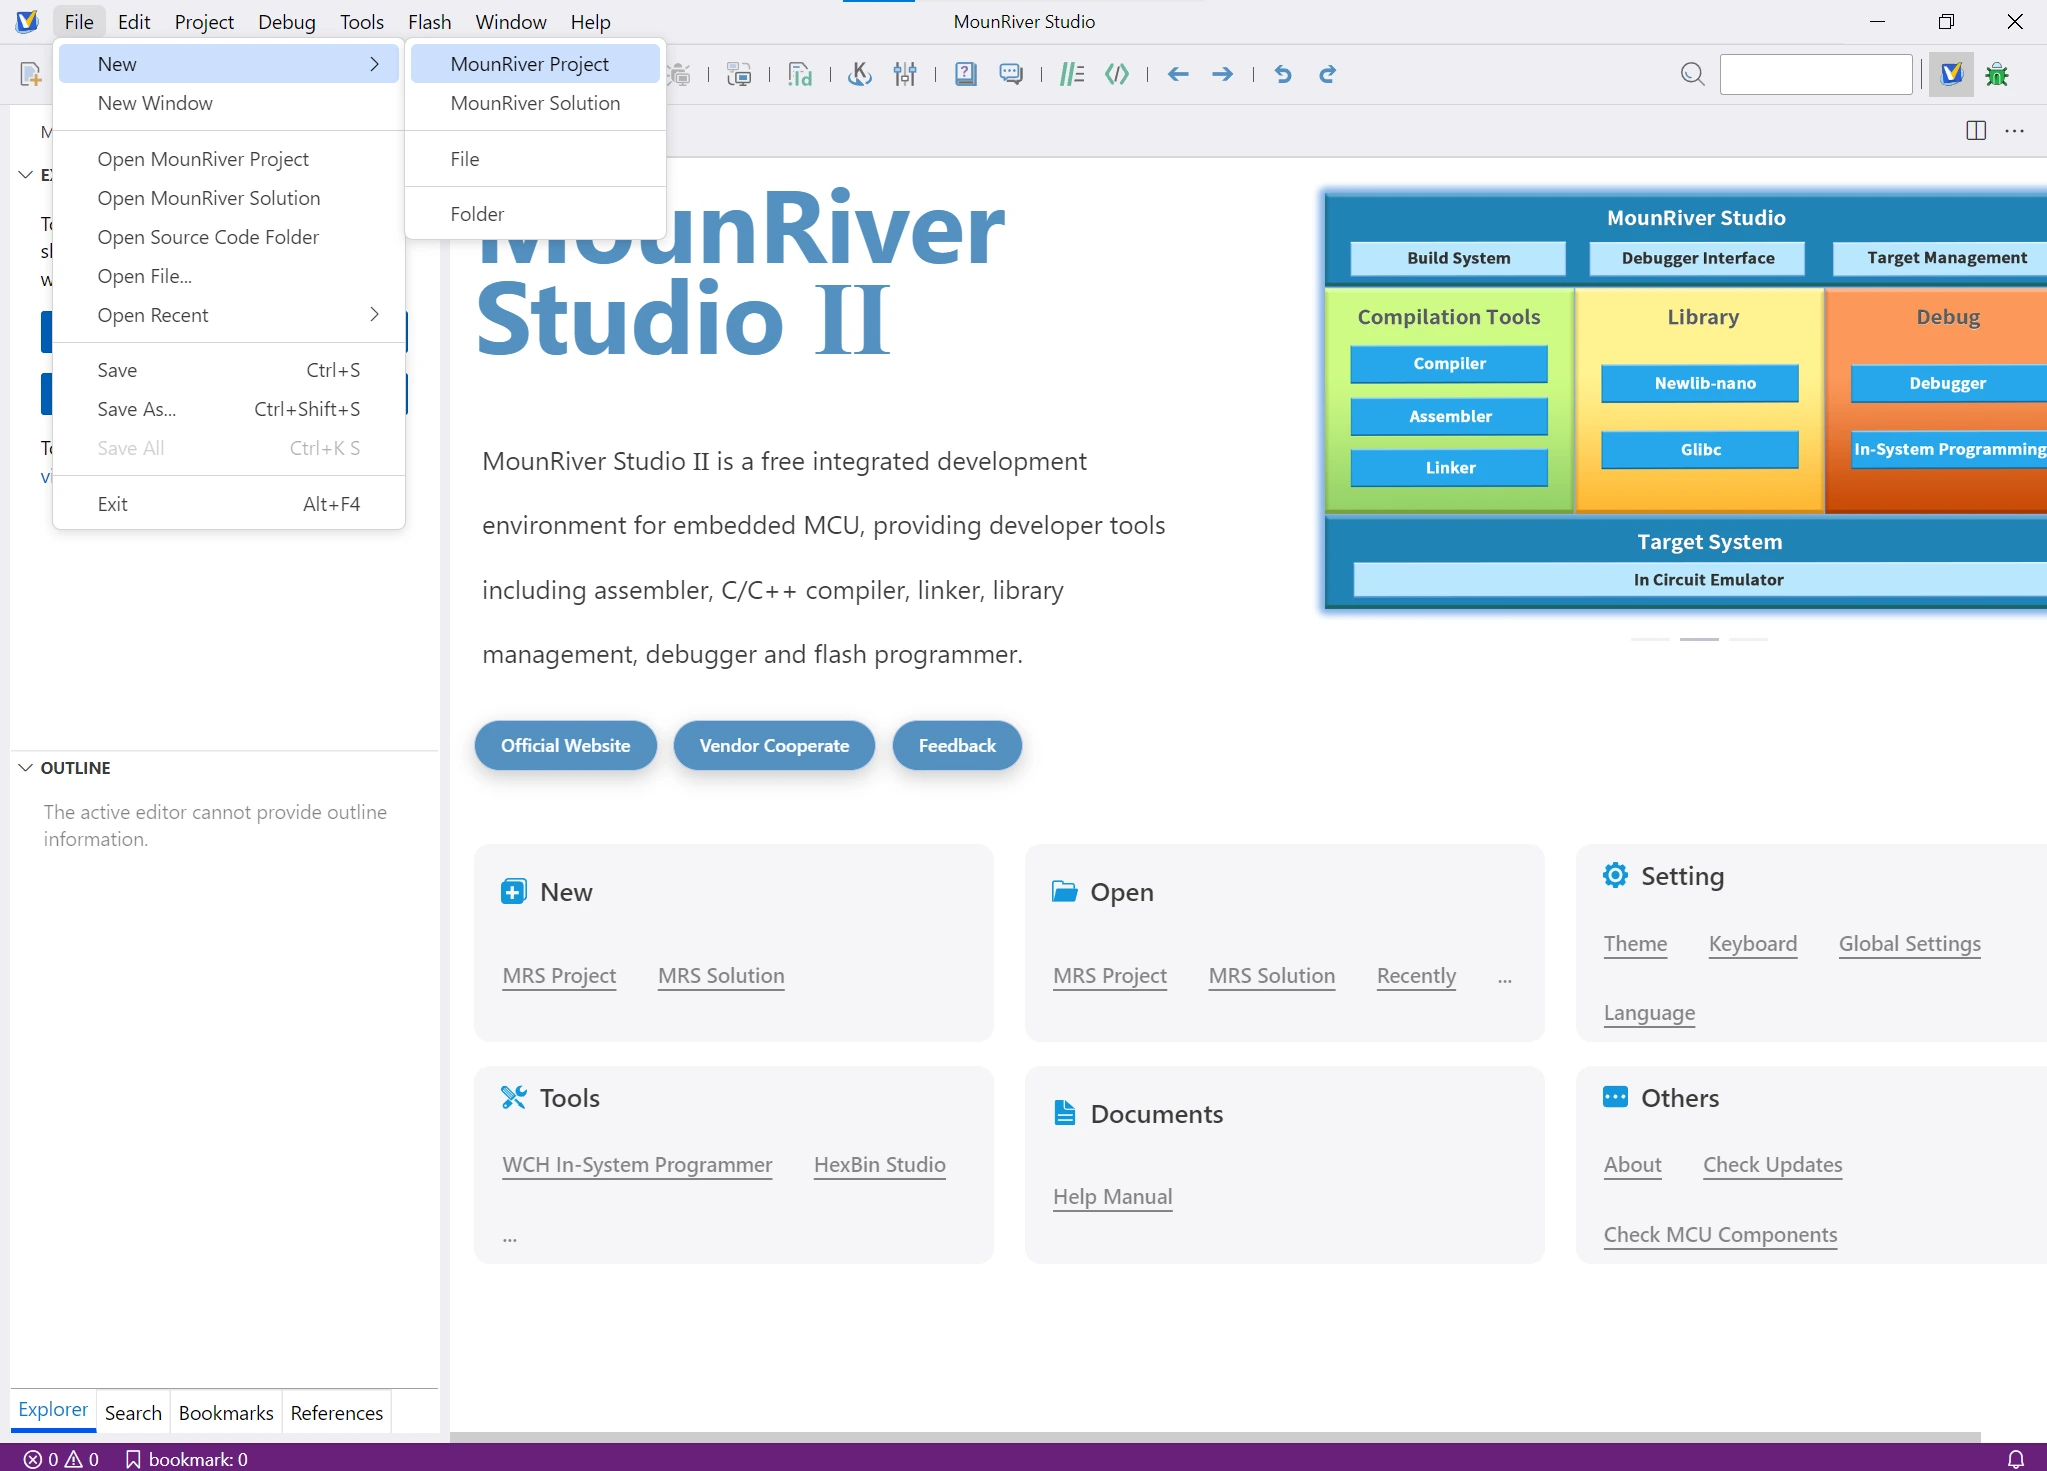
With the IDE setup and ready, we need to create a basic project. The reason for this is that we need to configure the WCH Link E programmer, and that can only be done with an active project. So to do this, click File > New > MounRiver Project
When the new project dialog opens up, first select the CH32V003 in the left part selection window, then select the CH32V003F4U6 in the right part window, and then change the name of the project to whatever you like (in this case, MyFirstProject).
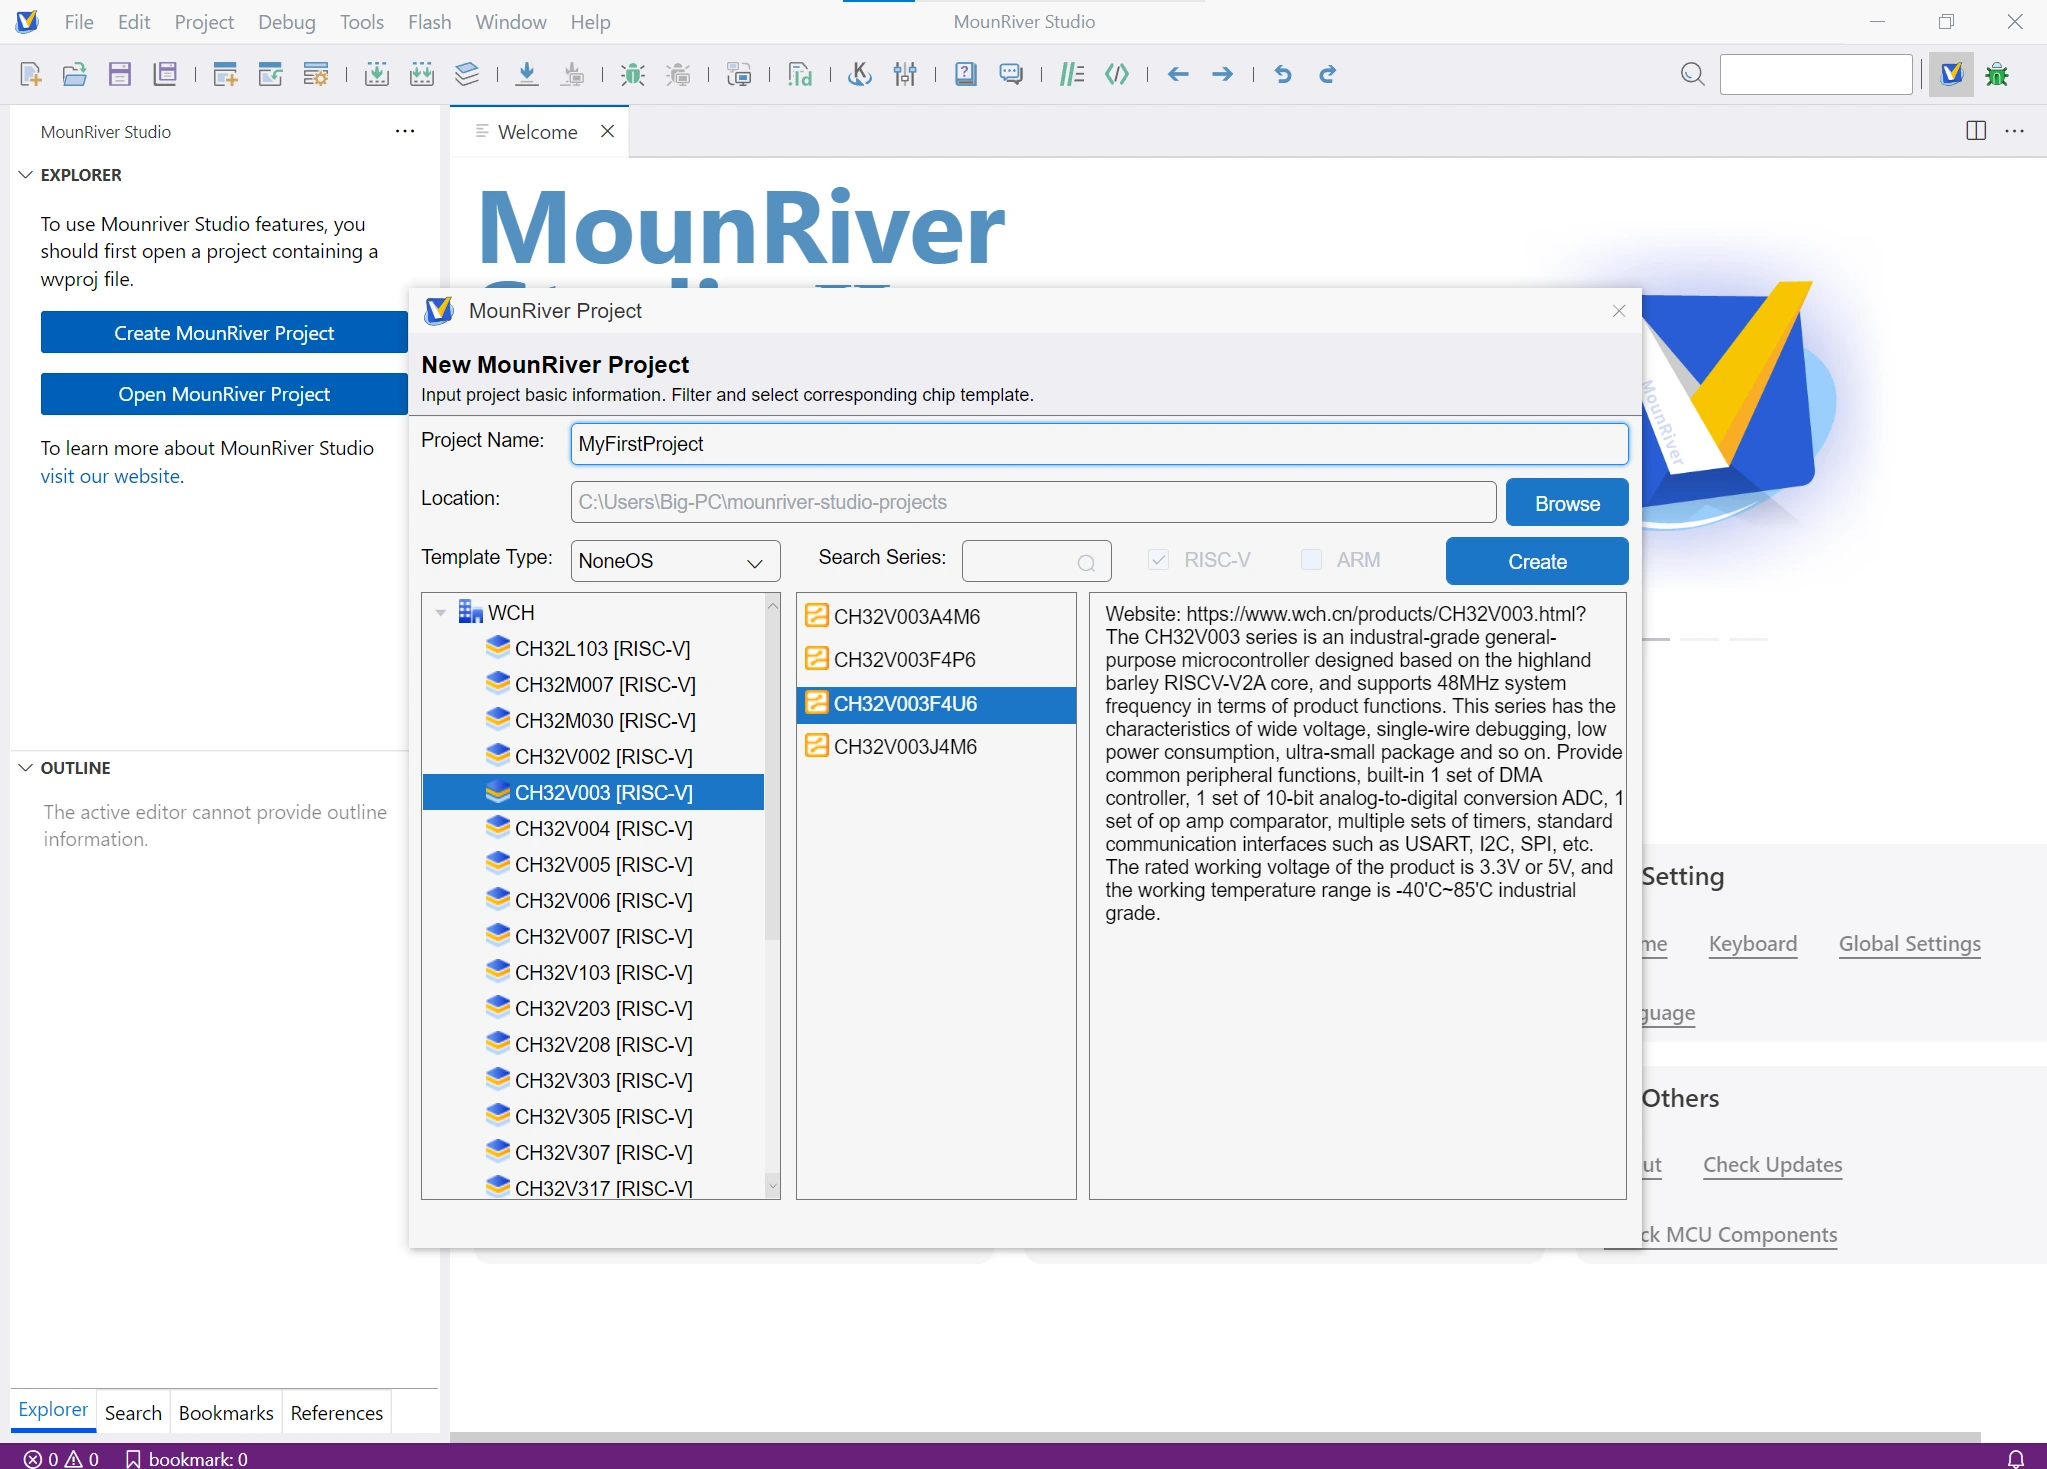
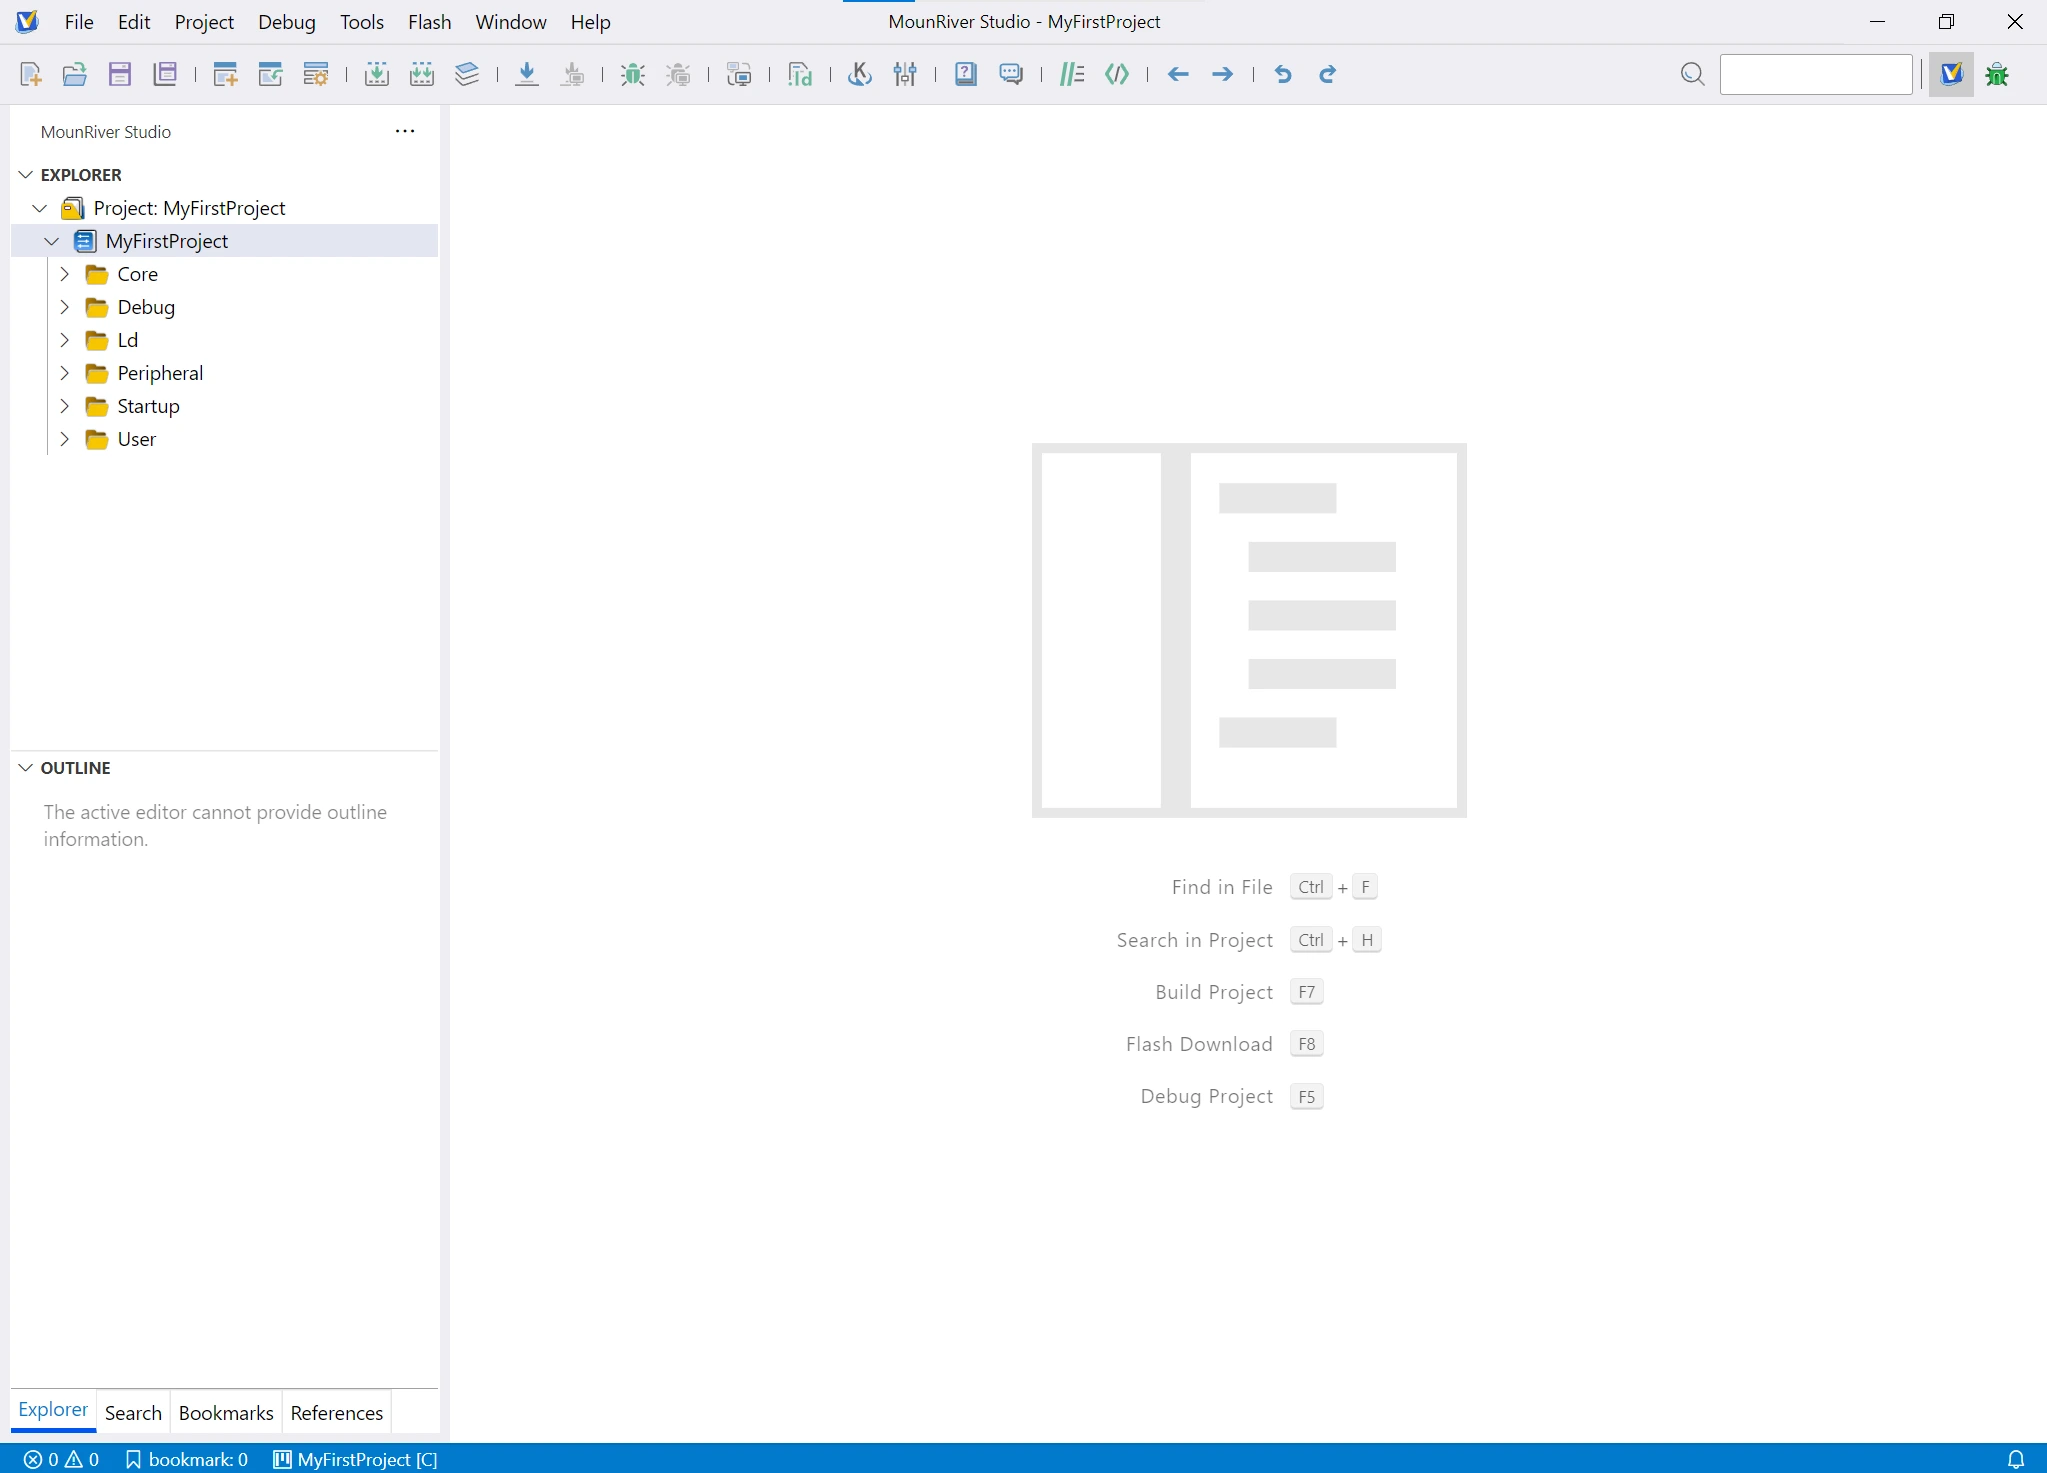
Click Create, and your project will be ready to use!
Step 5 – Configuring the WCH Link E
The WCH Link E programmer is a special programmer, as it is able to program both ARM and RISC-V devices. Of course, we don’t want to use the ARM mode because we like our CPUs open and free, so instead, we will need to use RISC-V mode.
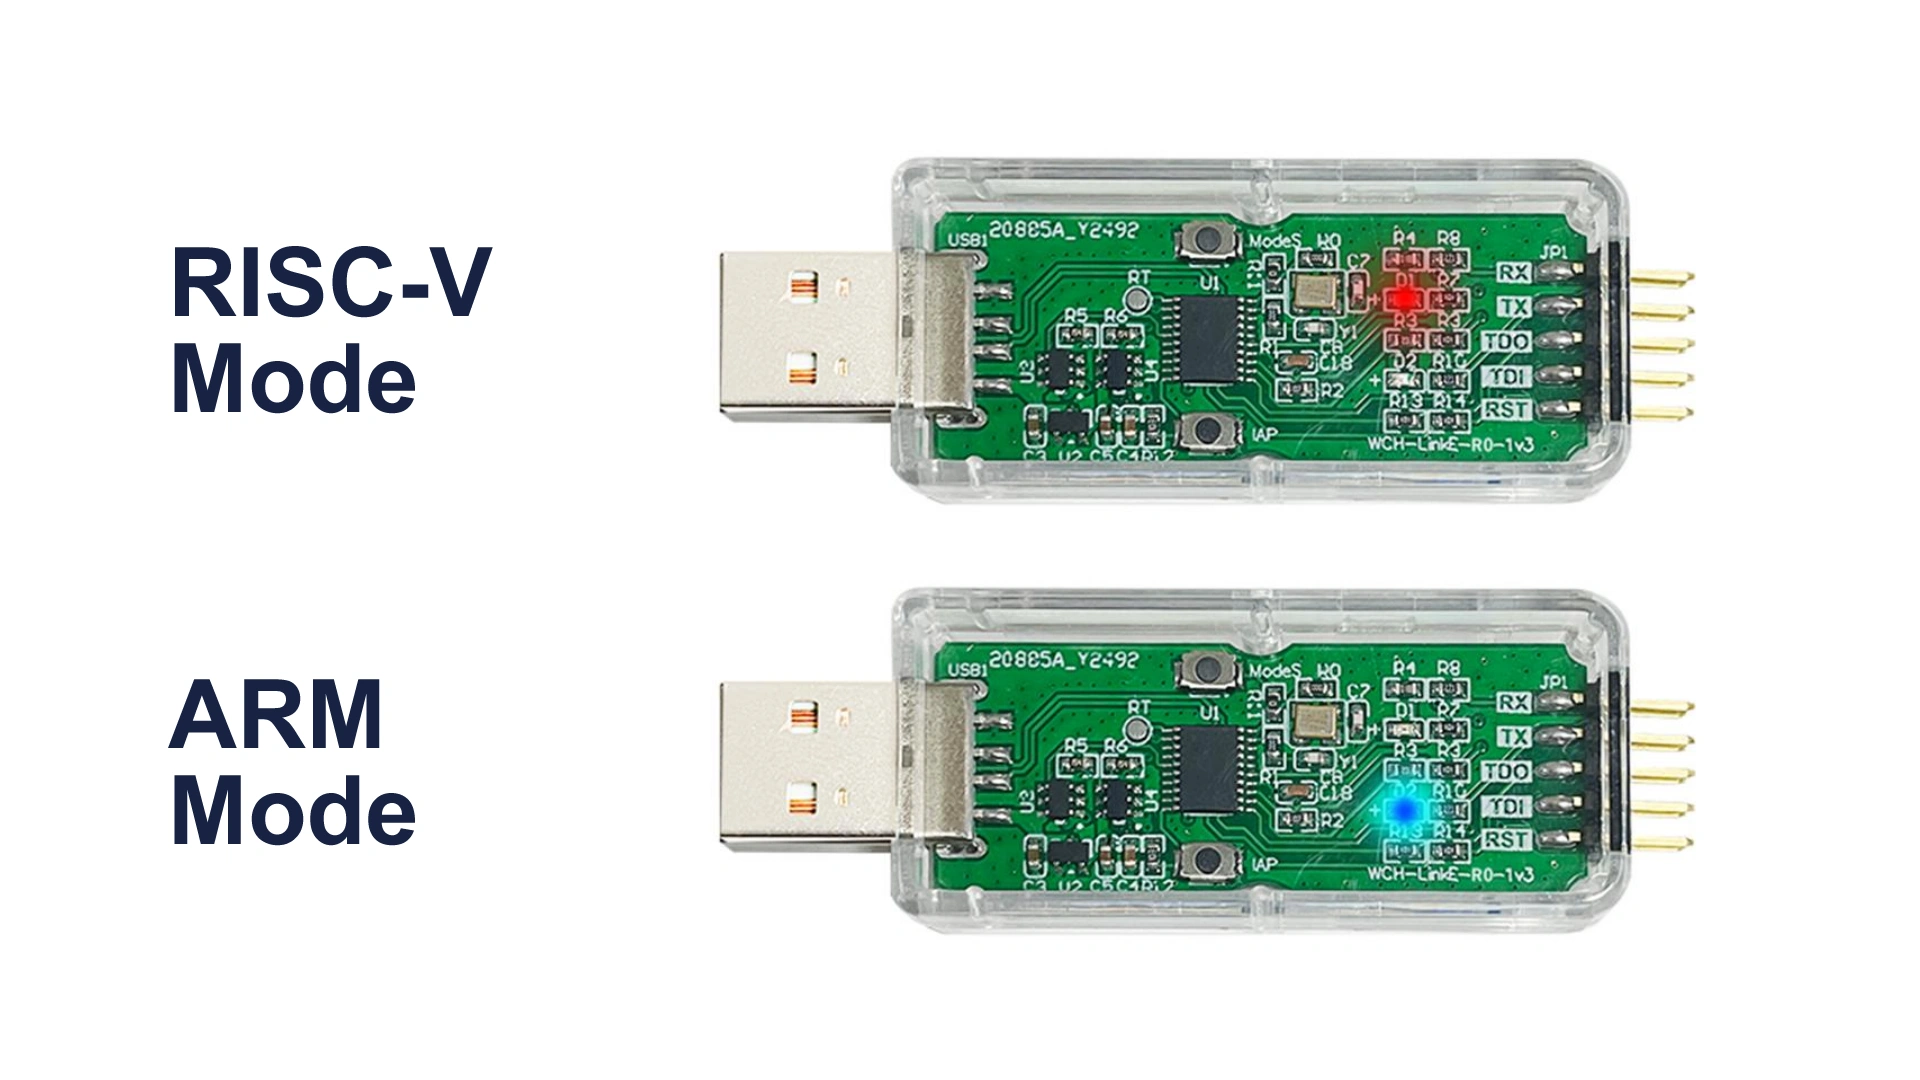
Now, just like how we said that the engineers at WCH actually have brain cells, well, they did some 4D chess on the WCH Link E programmer and decided to include a super bright LED that tells you if it’s in ARM or RISC-V mode.
Start by plugging in the WCH Link E device into your machine, wait a few seconds, and if you only see a red light, you are in RISC-V mode, so continue to the next step. If, however, you see a blue light, you are in ARM mode.
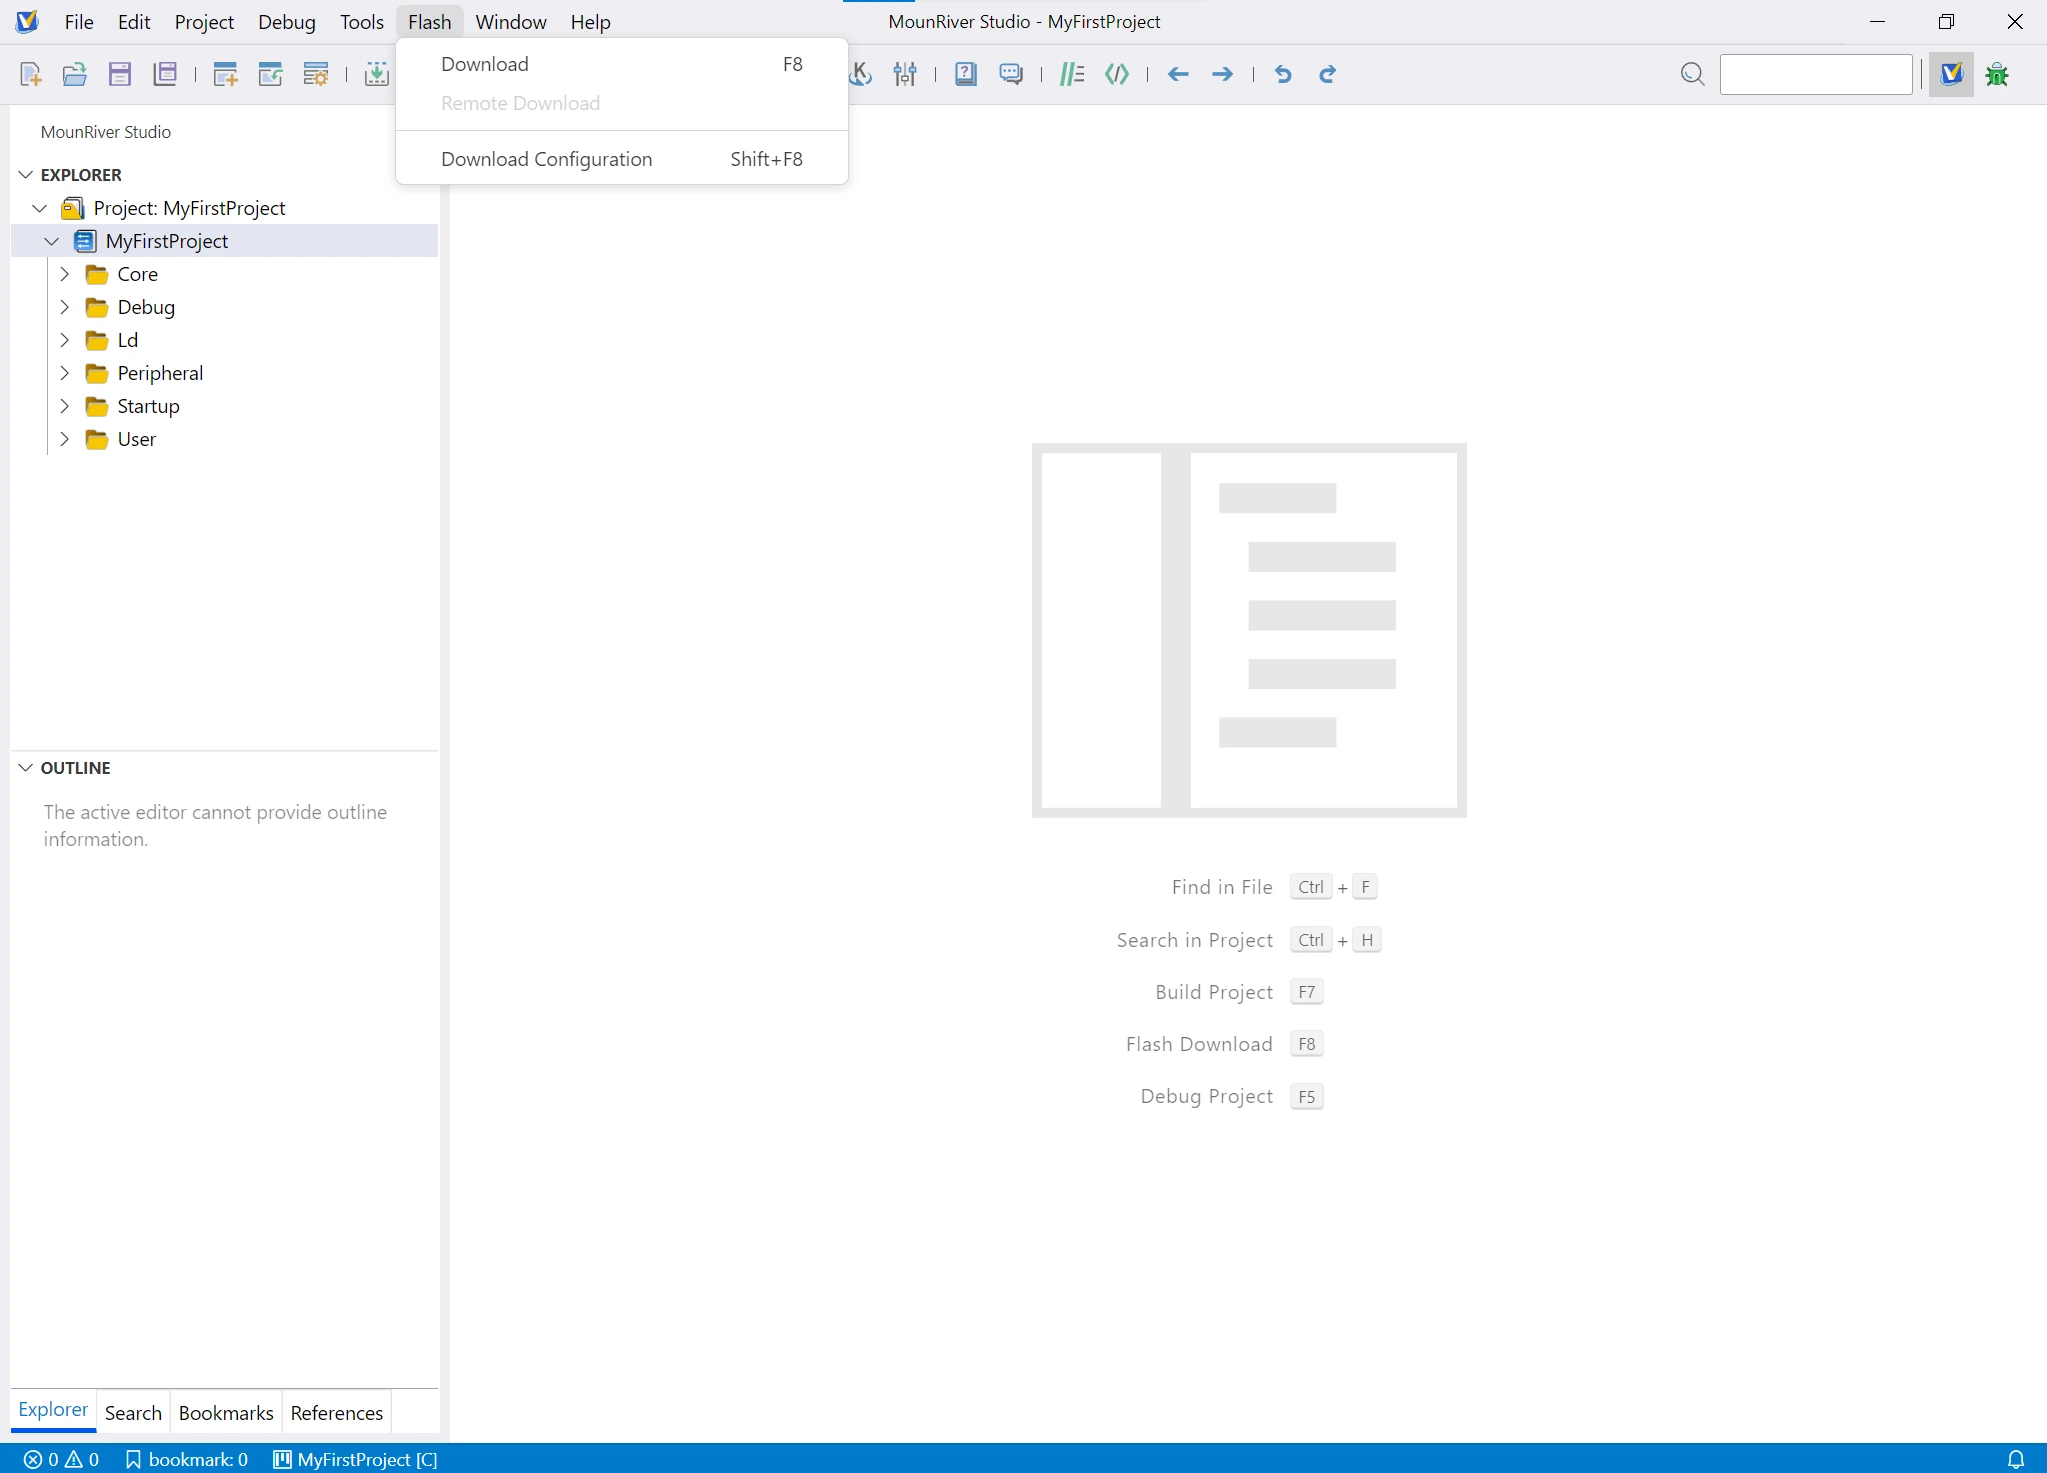
To get the WCH Link E into RISC-V mode, start by going into the IDE that is already open, and click Flash > Download Configuration to open up the configurator.
Inside the configurator window, click Download Settings in the left panel, and click the query button. This should immediately show ARM as the Device Target Mode. Change this drop down menu to RISC-V, and then click Apply.
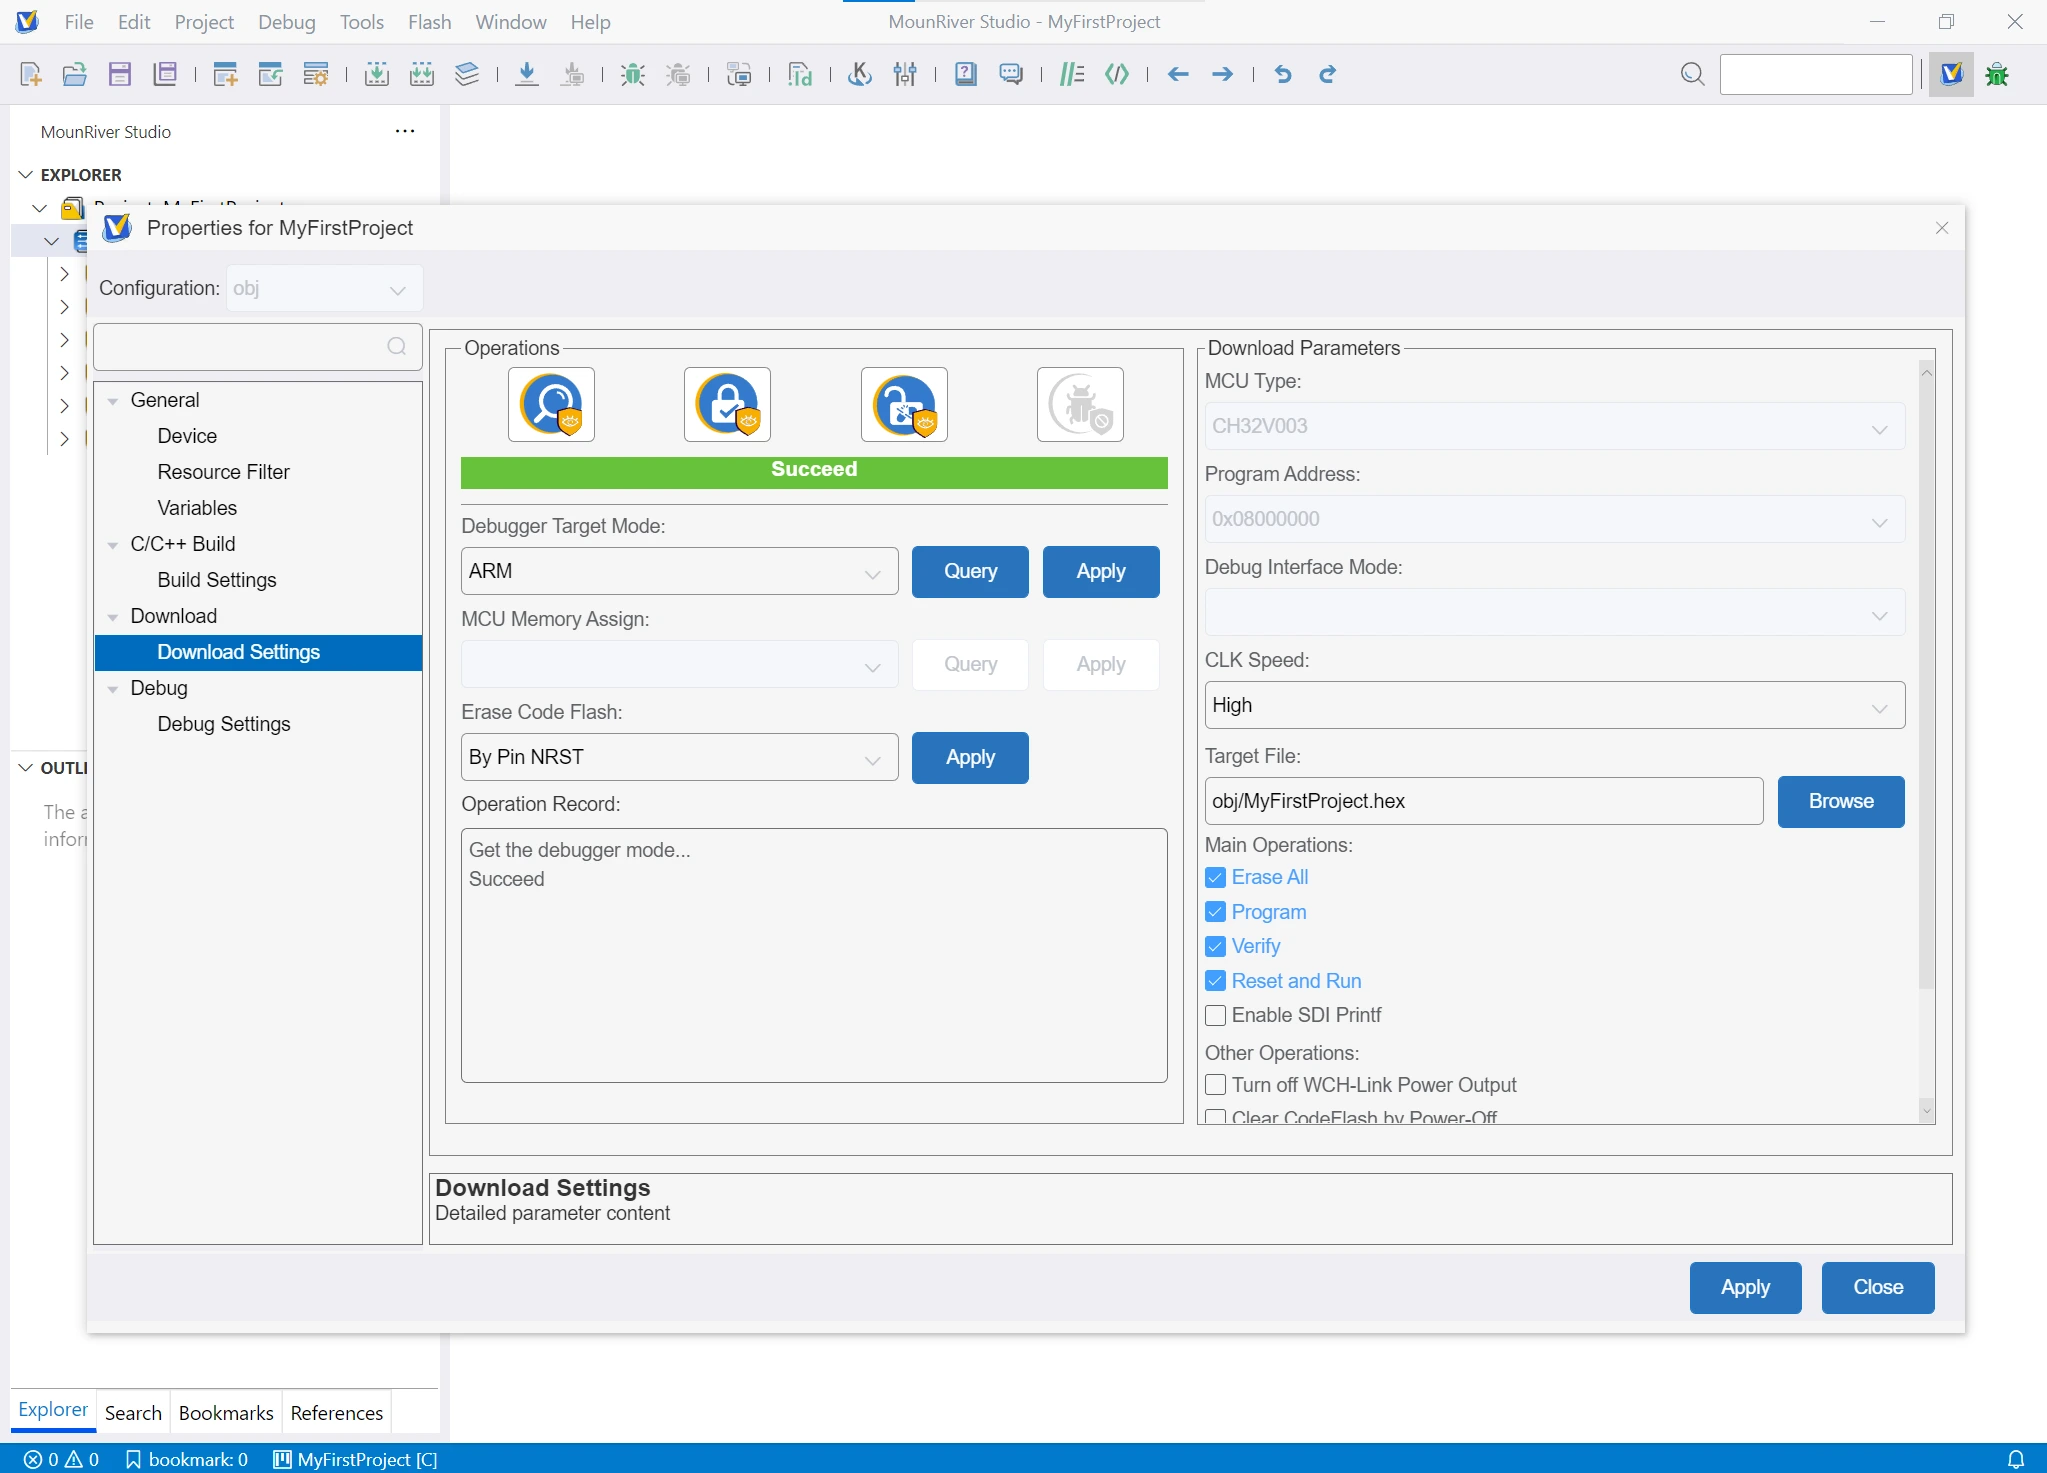
If it works, not only will the blue LED turn off, but you should hear the system chime that indicates that a USB device has been pulled out and reinserted.
Finally, to make our lives easier, we should also change the Erase Code Flash mode to By Power Off instead of By Pin NRST. What this means is that instead of needing a second programming wire to reset the chip, we can just have the programmer disconnect the power and re-enable it.
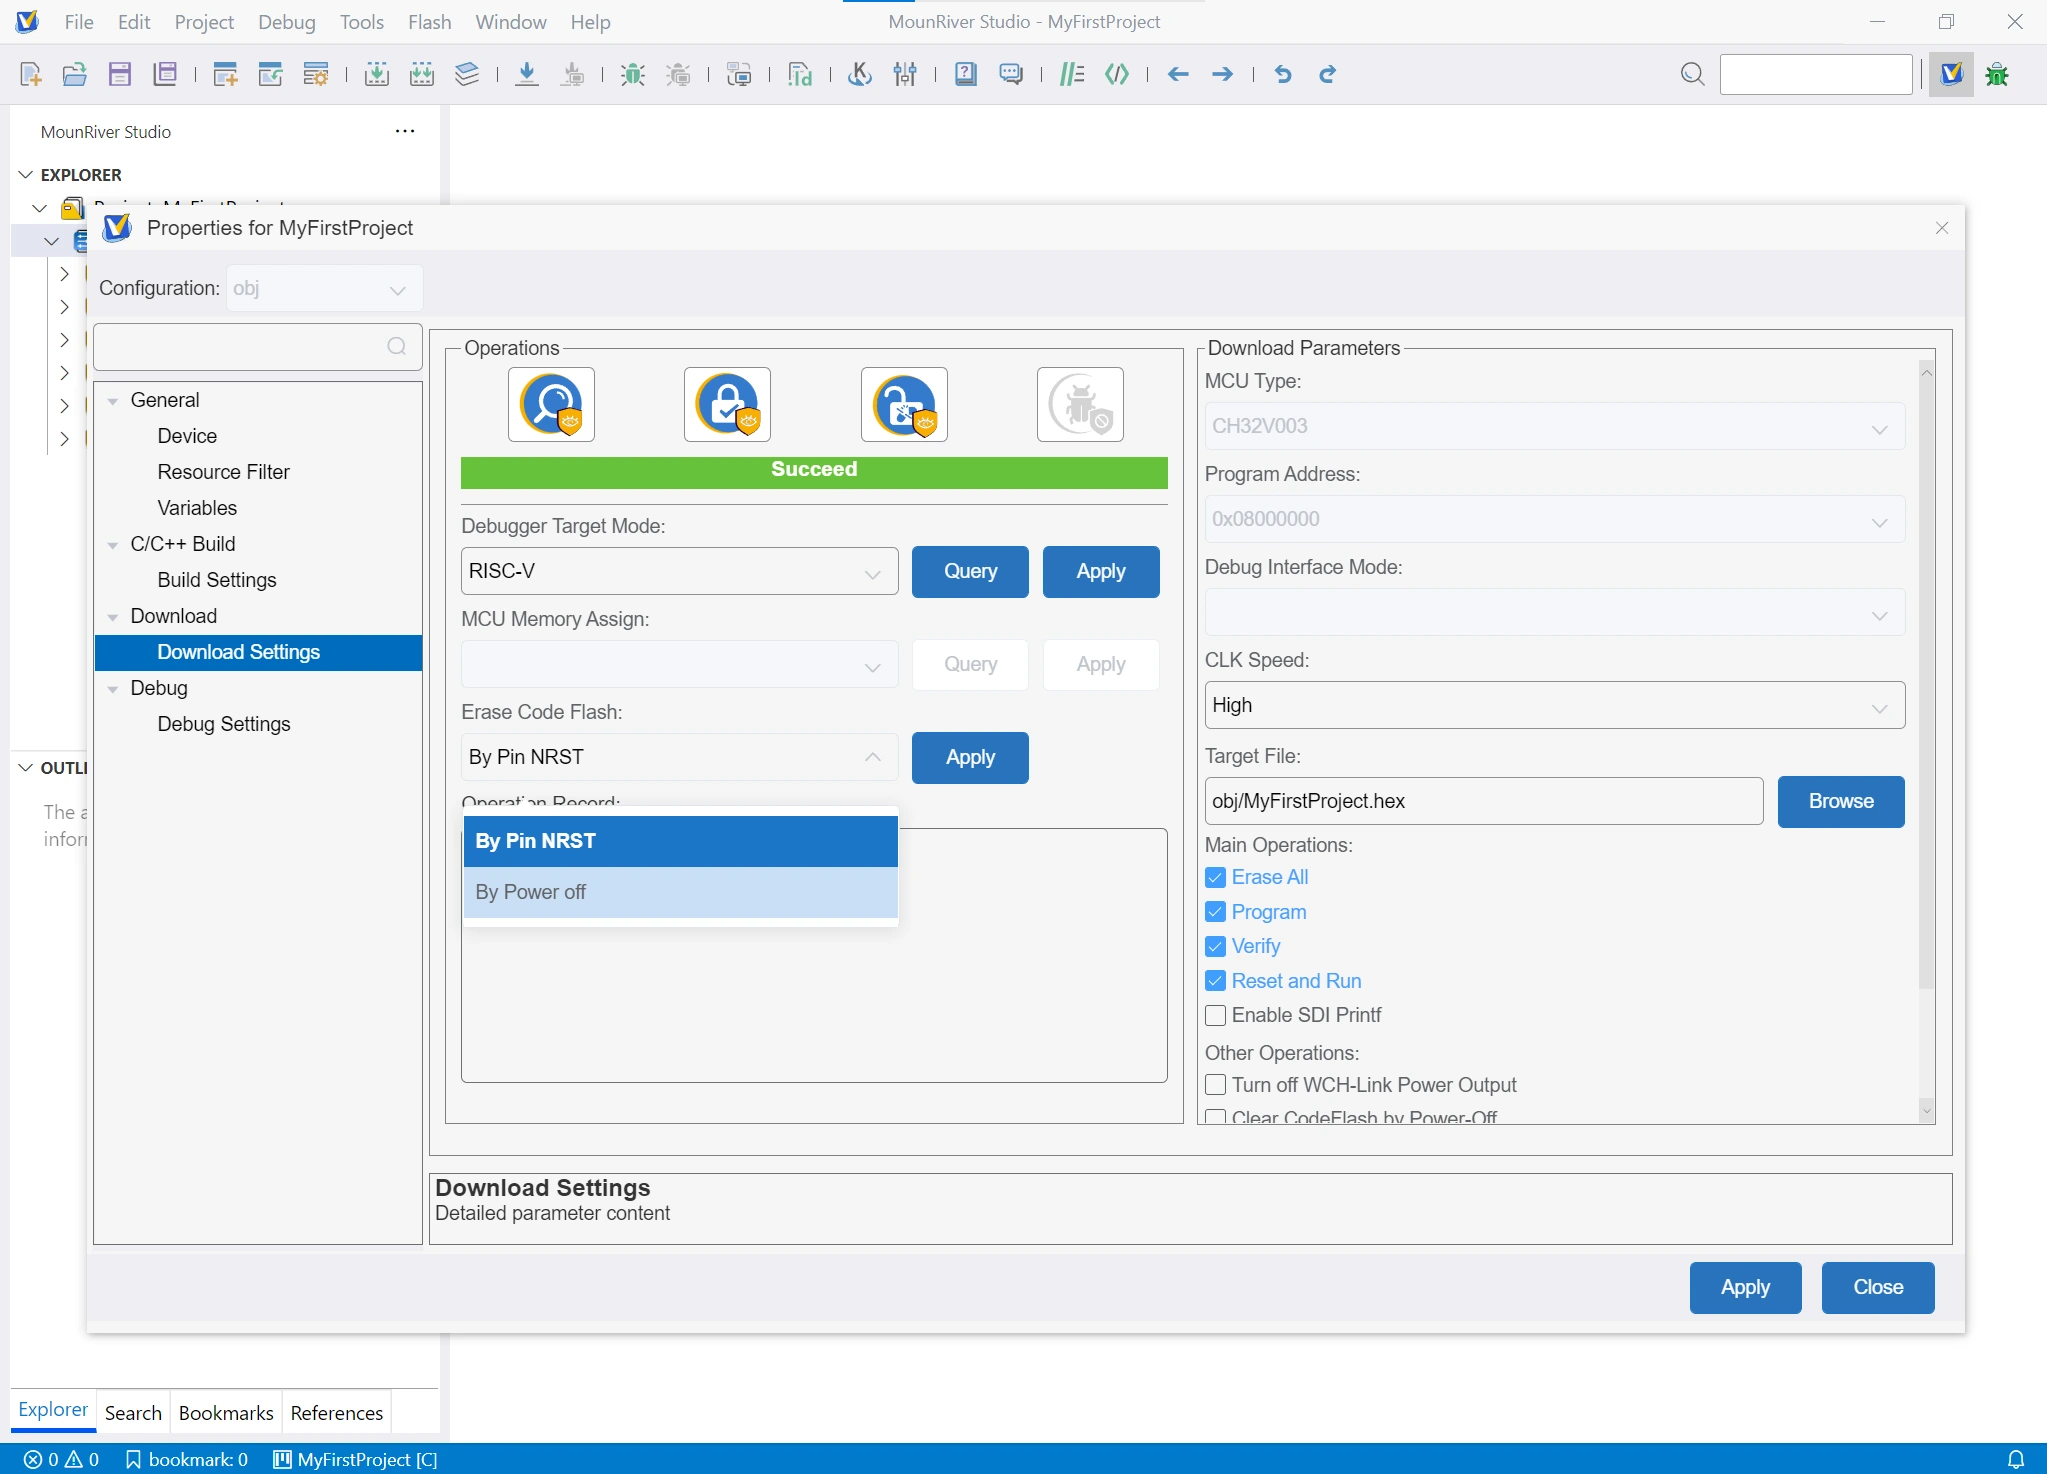
When you click apply, you may get a warning about firmware updates. It is a good idea to apply this firmware update, but it is critical that you DO NOT DISCONNECT THE POWER DURING THIS STEP.
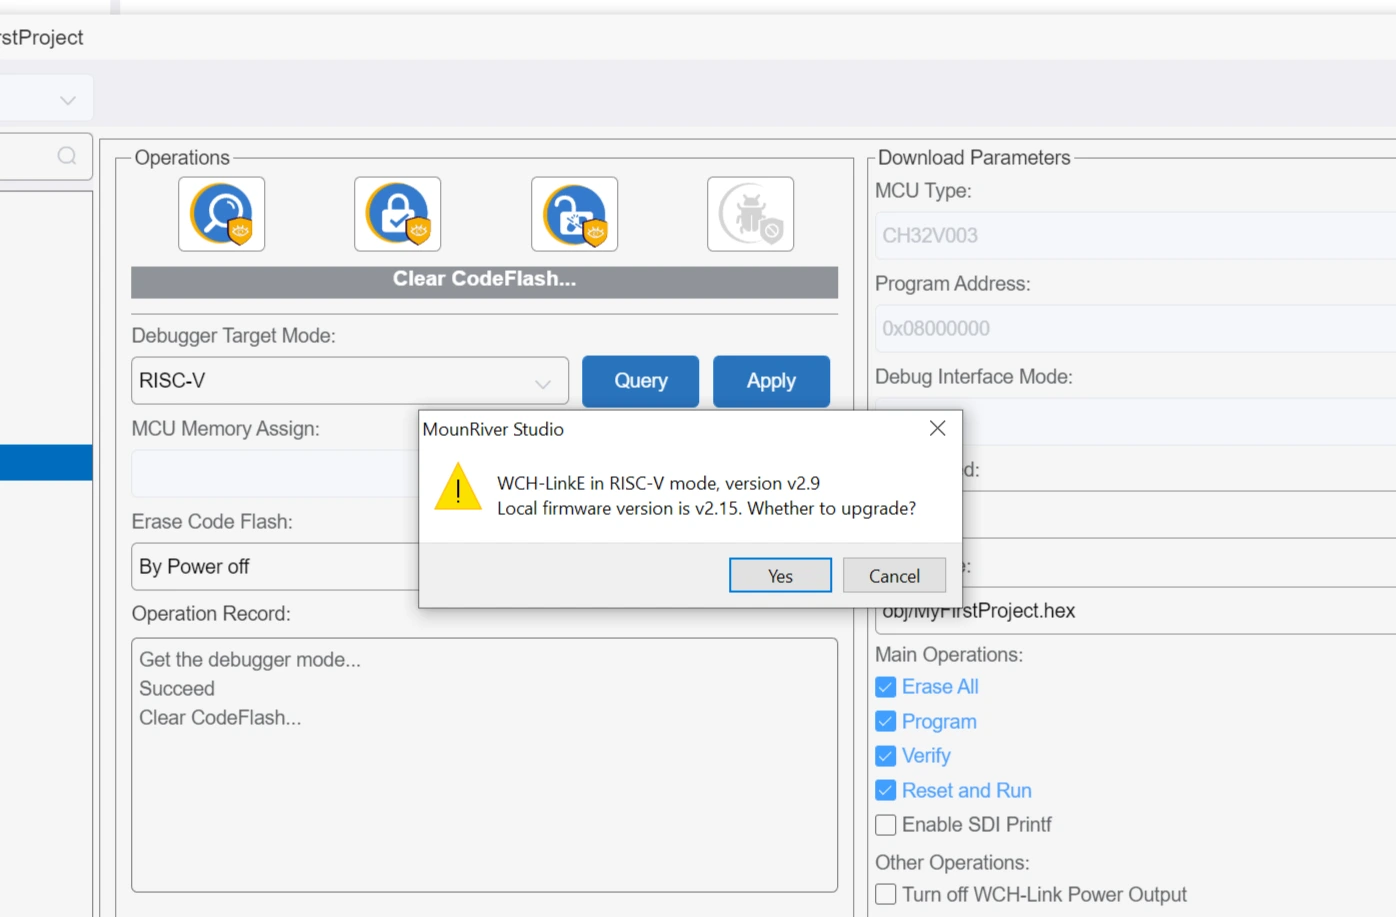
Again, you will hear the system chime ding about a disconnect and connected USB device, and if you go back to the configurator and query the device, it should show RISC-V as well as Power Off in the Erase Flash Mode.
Step 6 – Bask In Your Glory
That’s it! Your environment for programming RISC-V devices is ready to go. There is no need for complex toolchains, no need for console commands, no need to pull your hair out over programmers not working.
And to make things even better, the RISC-V chips only need a power, ground, and program wire to work with MounRiver, so you will defintely not be having issues like “target not detected” or “programmer not ready”.
Now, you could argue that Arduino platforms are more friendly because they integrate the programmer in their code, whereas these RISC-V devices need an external programmer, but when you think about it, was setting up MounRiver really that hard? Isn’t it so much better that we have a debugger that let’s us watch variables as the program runs, something that Arduino can’t do?
In the next tutorial, we will learn about the CH32V RISC DIP parts from MitchElectronics, the minimum circuit requirements for the WCH CH32V devices, and how to use them in your own circuit designs.